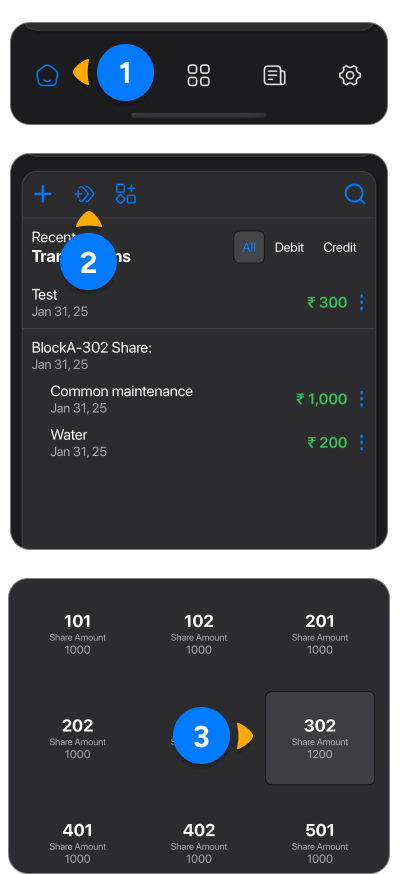
Roles and Permissions in AptNest App
1. Super Admin
The Super Admin has the highest level of access and control within the application. Their responsibilities include:
- Transactions: Full control to add, edit, or delete transactions.
- User Management: Ability to add, edit, or delete users.
-
Functionalities Management: Comprehensive management of all features, including:
- Flats
- Galleries
- Posts
- Notice Boards
- Services Listing
2. Admin
Admins have significant access but with certain limitations compared to the Super Admin:
- Functionalities Management: Can manage all functionalities, including flats, galleries, posts, notice boards, and services listings.
- Restrictions:
- Cannot manage (add/edit/delete) transactions.
- Cannot delete or edit galleries, posts, services listings, or other content created by other users.
3. User
Users have read-only access to most features:
-
View Permissions:
- Transactions
- Galleries
- Services Listing
- No Management Rights: Users cannot add, edit, or delete any content.
4. External User
External Users have limited access, focusing on specific features:
-
View Permissions:
- Apartment Users Communication Options
- Gate Passes
- Services Listing
- Restricted Areas: Cannot view or access:
- Transactions
- Galleries
- Posts

USERS
Add users
Only the Super Admin has the ability to add new users and manage user access permissions.
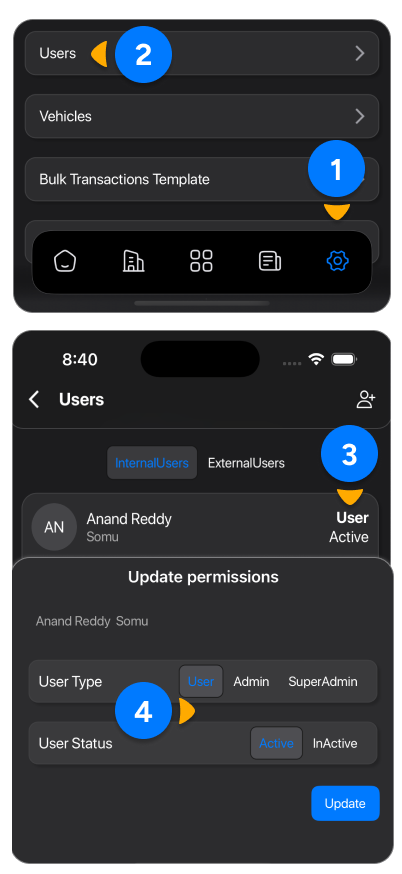
- Navigate to the Settings tab by clicking on the settings.
- Tap on Users, then tap the Add User icon located in the top-right corner. This will open a bottom sheet.
-
Fill in the required fields:
- First Name, Last Name
- Phone Number (Ensure the phone number is correct, as it will be used for login purposes.)
USERS ROLE
Change User Permissions and Status
Only the Super Admin can modify user permissions and status.
To update permissions or change user status:
- Navigate to the Settings tab.
- Tap on Users and select the user whose details need to be updated.
-
In the Permissions section:
- Adjust the user's role or access levels as needed (e.g., User, Admin, Super User).
-
In the Status section:
- Toggle the user's status between Active or Inactive.
Ensure you save the changes after updating permissions or status to reflect them in the system.
NOTE: Inactive Status: Restricts the user's ability to log in or access any functionality
APARTMENT FLATS
Add, Update, or Delete a Flat
To manage flats, follow these steps.
Add a New Flat:
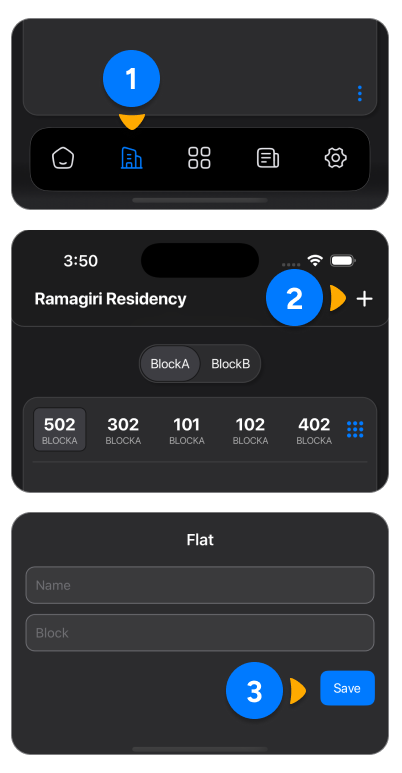
- Go to the Apartment tab (second from the left).
- Tap the + icon in the top-right corner. This opens the Flat sheet.
-
Enter the required details:
- Flat Name: For example, "101".
- Block Name: For example, "Block A".
- Tap the Save button to add the flat.
Update a Flat:
- Go to the Apartment tab and locate the flat you want to update.
- Tap on the existing flat number.
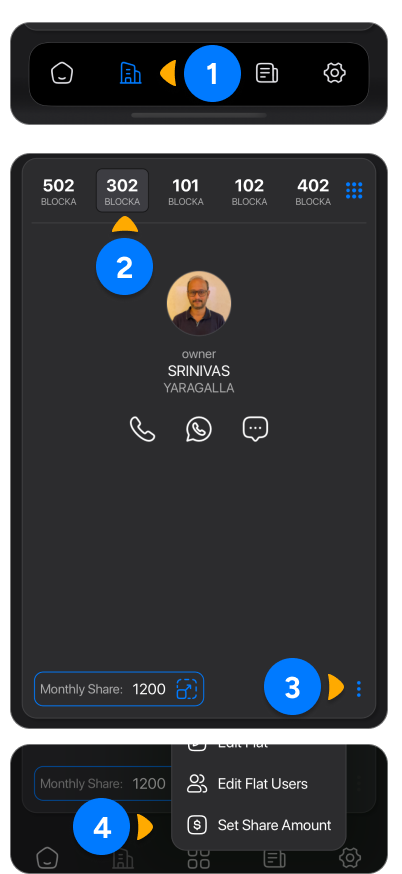
- From the Options Menu (ellipsis at the bottom right), select Edit Flat.
- Update the flat details as needed and save the changes.
Delete a Flat:
- Follow the steps above to open the Options Menu for the desired flat.
- Tap Delete icon and confirm the deletion.
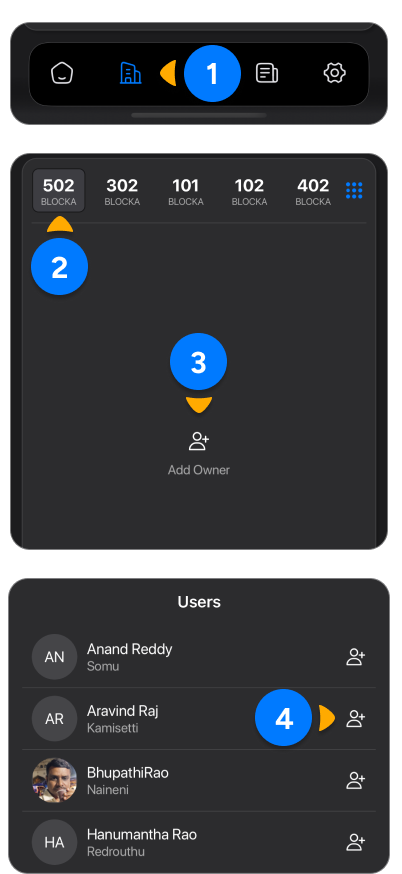
FLAT USERS
Add Owner or Tenant to a Flat
To manage flats users, follow these steps.
- Navigate to the Apartment tab (second from the left
- Tap the user+ icon (visible only if no owner has been added yet). This will display a list of Apartment users previously added under Settings > Users.
- Select the appropriate user from the list to assign them to the flat.
Alternatively:
- Open the Options Menu (ellipsis at the bottom right) for the desired flat.
- Select Edit Flat Users from the menu.
- Choose the correct user from the list and save your changes.
